Today on the blog I'm excited to welcome back my brother, Grant Johnson, to share his secrets for capturing stunning fireworks photos. He is an amazing photographer who specializes in night photography and he has taken some incredible fireworks photos that he will share with us today. He's even given us a free cheat sheet to help us remember this information when we're out photographing fireworks. Watch for that at the end of the article. Thank you, Grant!
The Fourth of July is fast approaching, bringing with it the opportunity to make some brilliant and dramatic images of fireworks. These types of photos have some unique challenges to capture. Here are some of my tips for making photos that you will be happy to look back on.
Plan Ahead
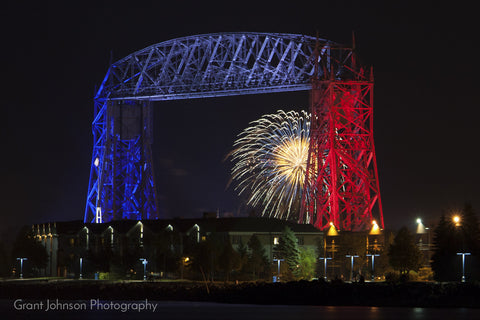
First (and second, and third): location, location, and location! Prime consideration, of course, is knowing where the pretty lights will be blooming. Can’t shoot the lights if you can’t see them! Just as important, though, is choosing a meaningful foreground subject. Photos of fireworks on their own are boring. Might as well just look at someone else’s on Pinterest. Or clip-art.
 (Ooooh. Ahhhh. *yawn*)
You want spectacular, memorable and meaningful photographs. That requires setting the scene a bit. What makes the area special to you? Are there defining landmarks? Are you with friends or family? Would any landscapes, statues, bridges or other architecture provide an interesting silhouette? You can even choose a location miles from the event, as long as you’ll have line of sight to the fireworks.
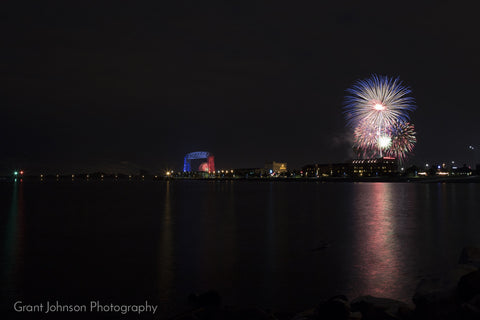
Use reflections. A lake or river across from the show - or even just a puddle of rainwater - could make for dazzling reflections. A building’s windows can mirror the lights. Or for something really artsy, see if you can catch the fireworks reflected in a child’s eyes as they gaze in wonder.
 (Shiny)
Weather is also important to consider, and not just for the rain forecast. Pay attention to which way the wind is blowing, and put yourself upwind from the fireworks. Smoke can build up as the show goes on, and you don’t want it building up between you and the lights.
Set a Schedule
Preparation is key. Once rockets are glaring and bombs are bursting in air, it’s easy to get flustered and forget something important. Like your lens cap. Give yourself time to set up well in advance of the event, preferably while you still have daylight to see what you are doing. The earlier you can stake out a spot, the better your chances of beating the crowd. For large events, even an hour early might still be too late. It can pay off to do reconnaissance days in advance, especially if you are unfamiliar with the area. The more prepared you are, the less you have to hassle with the camera adjustments, and the more you can focus on enjoying the show.
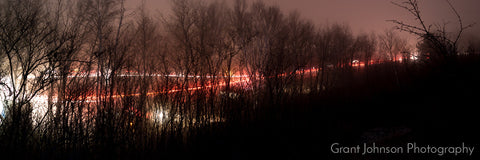
Plan to stick around a while after the fireworks, too. Sometimes the smoke after a finale can be just as interesting as the lights. If you’re one for people-watching, catch folks as they’re departing and see who is excited and who’s tuckered out & ready to get home. The parade of lights from cars filing out can be an interesting long-exposure opportunity too.
The Gear
Forget going hand-held. A tripod is essential. Those long, dramatic trails of light take exposures of several seconds. Any movement during the exposure translates into wobbly lights.
Even with a tripod you have to watch out for camera shake. I recommend using a remote shutter release for added stability. If you don’t have a remote, see if your camera can be set to delay a couple seconds after pushing the shutter button. It may make it harder to time the shot perfectly, but your photos will be much clearer if the camera settles from being jostled before it snaps the shot.
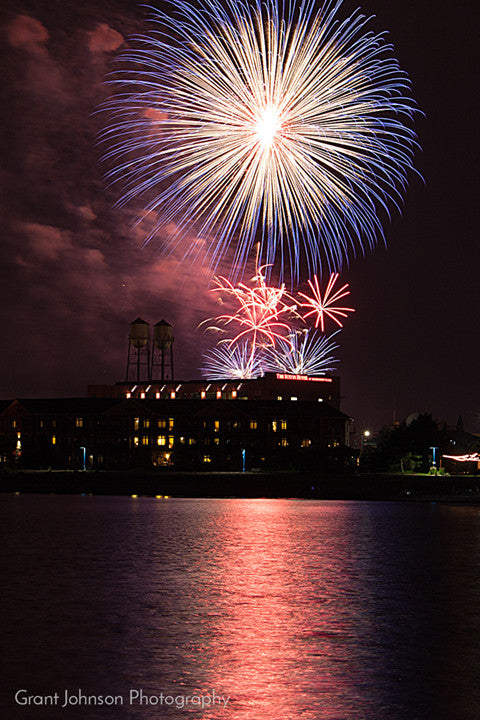
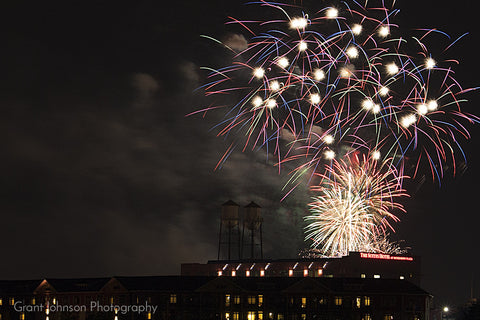
The big question: what lens to use? The big answer: depends. There are a lot of variables to consider, and many rely on personal preference. Mostly it depends on how you want to frame your shot. Wide-angle lenses can capture all of the lights over a landscape or cityscape, but the lights might end up looking smaller in the photo than they “feel” in person. Compare this 16mm photo with the image at the very top of this post, which was taken at the same time but at 50mm.
(Engage Squint Mode)
Zooming in from afar using a telephoto lens, the looming lights can dramatically silhouette a subject, but you are limited to a smaller slice of the sky. I’ll discuss framing more later.
Technique
Camera settings are another variable to consider. Trying to shoot in Auto mode at night is a goat rodeo - cameras can’t compensate for quick changes in brightness. If your camera has a manual mode of operation, you’ll have much more success capturing your shots. If you’re not comfortable with the advanced camera settings, fear not! Some parts are rather easy to manage.
First, whether you’re using a point & shoot or DSLR, you’ll want to turn off your flash. This prevents over-exposing your photos (and blinding folks around you).
Next, turn off Auto-Focus. For DSLR cameras, this is typically a switch on the side of your lens. Otherwise it may be an option within your menus. Cameras have difficulty focusing in the dark, so you need to manually set your focus. I find it useful to use the “Live-View” display on the back of the camera and zoom in on that display to make sure the subject is in crisp focus. Once focus is achieved, try to avoid zooming in/out or making other adjustments that might take you out of focus.
Next, look for a manual mode of operation that will allow you to control the shutter speed, aperture and ISO settings. If you’ve never tried manual camera operation, you should practice prior to the event to get a feel for it. If your camera has a histogram display, use that to get an idea of how properly exposed the images are. Here are the three main settings & how I use them for fireworks:
Shutter Speed (“Tv” or “S”): 1 to 6 second exposure times. Longer exposures will result in longer trails of light, but too long can end up looking cluttered or over-exposed. I sometimes go out to “Bulb” mode, which keeps the shutter open for as long as you hold the button down.
ISO: I typically aim for low sensor sensitivity, in the 100 to 400 range, to keep photos from getting too noisy/grainy. Your mileage may vary.
Aperture Value (“Av”): This is the fudge-factor. It adjusts how wide the opening is to let light into the camera during the exposure. Start at a middle range, like f/9.0. If the shots are looking too dark, open it up more, say to f/5.6. If things are too bright, tighten the aperture up to f/11, maybe even f/16 or higher. Keep in mind that changing the Aperture also affects the focus - you’ll want to check to be sure your scene is still sharp.
Framing
Here’s where we tie it all together! You have scouted your location, chosen a foreground object of interest, and have an idea where the fireworks will be in the sky. Now the trick is to get it all in one photo!
My first tip here is to give yourself plenty of space in the frame. Cameras these days have so many megapixels that it’s easy to crop out a portion and still have plenty detail. So don’t worry about getting the photo exactly framed. Be more concerned about having the horizon level & that you’ll be able to catch the fireworks in the shot.
(This is a cropped section about 1/4 the size of the full image - still plenty big.)
As a general guideline, many people follow the Rule of Thirds. Using this, you could place your subject to take up about a third of the image, with the fireworks filling the other two thirds. Or have the foreground subject using up two thirds of the frame while the fireworks fill the remaining third. Your camera may even have its display broken up into a grid of thirds to make this easier to do.
However you decide to frame the shot, once you’ve got it framed & focused, leave it. Avoid the temptation to zoom in/out or to shoot from other angles, because you’ll have to spend more time re-focusing for the next shot. Especially as the show hits its crescendo to the end - you don’t want to be caught moving your tripod during the finale!
Have Fun!
Hopefully I’ve given you some useful tips to guide you through some of the challenges of fireworks photography, and planted some ideas for different ways of taking your photos. Have fun, and don’t forget to look up from your camera occasionally & enjoy the show!
- - - - - -
Those are some fantastic tips that I know will help us all capture stunning fireworks photos this 4th of July. As a bonus, you can download a cheat sheet here to help you remember Grant's favorite fireworks settings when you are on the go.
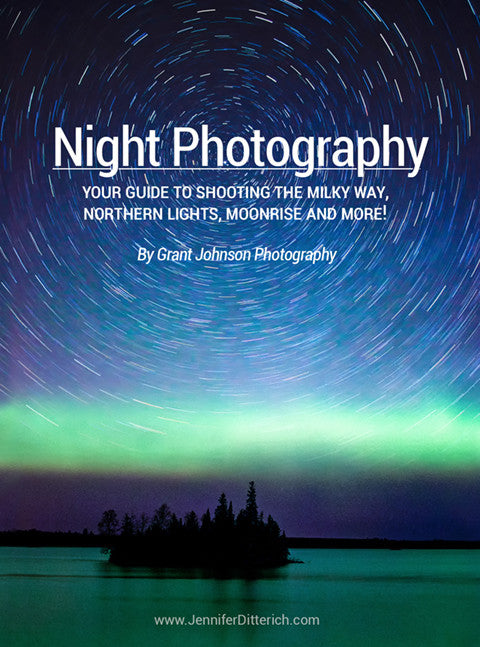
If any of you would like to see more of Grant's photography, check out his previous article, Intro to Night Photography. You will be amazed the at the dramatic images he has captured!